Cheesy Chicken Broccoli Rice Skillet (One-Pot Comfort Meal!)
Looking for an easy, cheesy, and hearty meal that comes together in just one pot?
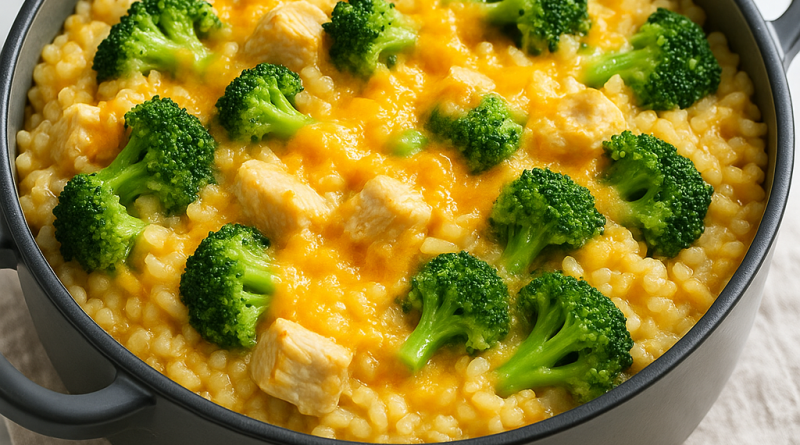
This Cheesy Chicken Broccoli Rice Skillet checks all the boxes!
Tender chicken, fluffy rice, vibrant broccoli, and a luxuriously creamy cheese sauce all cook together to create the ultimate family-friendly comfort food.
Perfect for busy weeknights, meal prep, or when you need a warm, satisfying dinner in under an hour.
Ingredients:
(Scale: 1x, 2x, 3x)
- 1 tablespoon olive oil
- 1 lb boneless, skinless chicken breasts, diced
- 1 small onion, diced
- 3 garlic cloves, minced
- 1 cup uncooked white rice
- 2 ½ cups chicken broth
- 1 teaspoon salt
- ½ teaspoon black pepper
- ½ teaspoon paprika
- ½ teaspoon dried thyme
- 2 cups broccoli florets, chopped
- 1 cup shredded cheddar cheese
- ½ cup shredded mozzarella cheese
- ½ cup heavy cream or milk
- 2 tablespoons unsalted butter
Instructions:
Step 1: Cook the Chicken
Heat the olive oil in a large pot or deep skillet over medium heat.
Add the diced chicken, then season it with:
- Salt
- Black pepper
- Paprika
- Dried thyme
Cook for about 5–7 minutes, stirring occasionally, until the chicken is lightly golden and cooked through.
Once done, transfer the chicken to a plate and set it aside.
Step 2: Sauté the Aromatics
In the same pot (no need to wash it — keep all that flavor!):
- Add the diced onion and minced garlic.
- Sauté for about 2 minutes, until the onion becomes soft and translucent, releasing a savory aroma.
This step deepens the flavor base of your dish beautifully.
Step 3: Cook the Rice
Stir the uncooked rice into the onion and garlic mixture, coating the grains with the aromatic oils.
Pour in the chicken broth, stirring to combine.
Bring the mixture to a gentle boil, then lower the heat to a simmer.
Cover the pot and let the rice cook for about 15 minutes, allowing it to absorb all the delicious flavors and become tender.
Step 4: Add the Broccoli and Chicken
Once the rice is mostly cooked:
- Stir the chopped broccoli florets and the reserved cooked chicken back into the pot.
Cover again and cook for another 5 minutes.
The broccoli should become tender but still have a slight crunch for texture.
Step 5: Make It Extra Cheesy and Creamy
Now comes the best part!
Stir in:
- Butter
- Heavy cream (or milk)
- Shredded cheddar cheese
- Shredded mozzarella cheese
Continue stirring until the cheese is fully melted and the mixture becomes creamy and luscious, coating every grain of rice and piece of chicken and broccoli.
Step 6: Serve and Enjoy!
Remove the skillet from heat.
Spoon the cheesy chicken broccoli rice into bowls and serve immediately.
Optional:
Top with extra shredded cheese or sprinkle with freshly chopped parsley for an extra pop of color and freshness.
Enjoy every warm, cheesy, satisfying bite!
Tips for the Best Cheesy Chicken Broccoli Rice:
- Cut broccoli small:
Small, evenly chopped florets cook faster and blend better into the dish. - Use freshly shredded cheese:
It melts better than pre-shredded cheese and creates a smoother sauce. - Add a crunchy topping:
Sprinkle some buttered breadcrumbs or crushed Ritz crackers on top if you love a little texture! - Customize:
Add mushrooms, peas, or even diced red peppers for more veggie variety.
Nutritional Information (Per Serving, assuming 6 servings)
| Nutrient | Amount |
|---|---|
| Calories | 430 kcal |
| Total Fat | 22 g |
| Saturated Fat | 11 g |
| Cholesterol | 95 mg |
| Sodium | 850 mg |
| Carbohydrates | 28 g |
| Fiber | 2 g |
| Sugars | 2 g |
| Protein | 30 g |
| Calcium | 25% DV |
| Iron | 12% DV |
(Nutrition facts are approximate and vary based on the exact ingredients used.)
Why You’ll Love This Cheesy Chicken Broccoli Rice Skillet:
- Made in one pot — easy cooking and minimal cleanup!
- Family-friendly and picky-eater approved.
- Perfectly balanced with protein, veggies, carbs, and loads of cheesy goodness.
- Great for leftovers — it reheats beautifully!
This Cheesy Chicken Broccoli Rice Skillet is truly the kind of comforting, hearty meal you’ll crave again and again — satisfying, delicious, and ready with just one pan!